2025/06/05 15:48

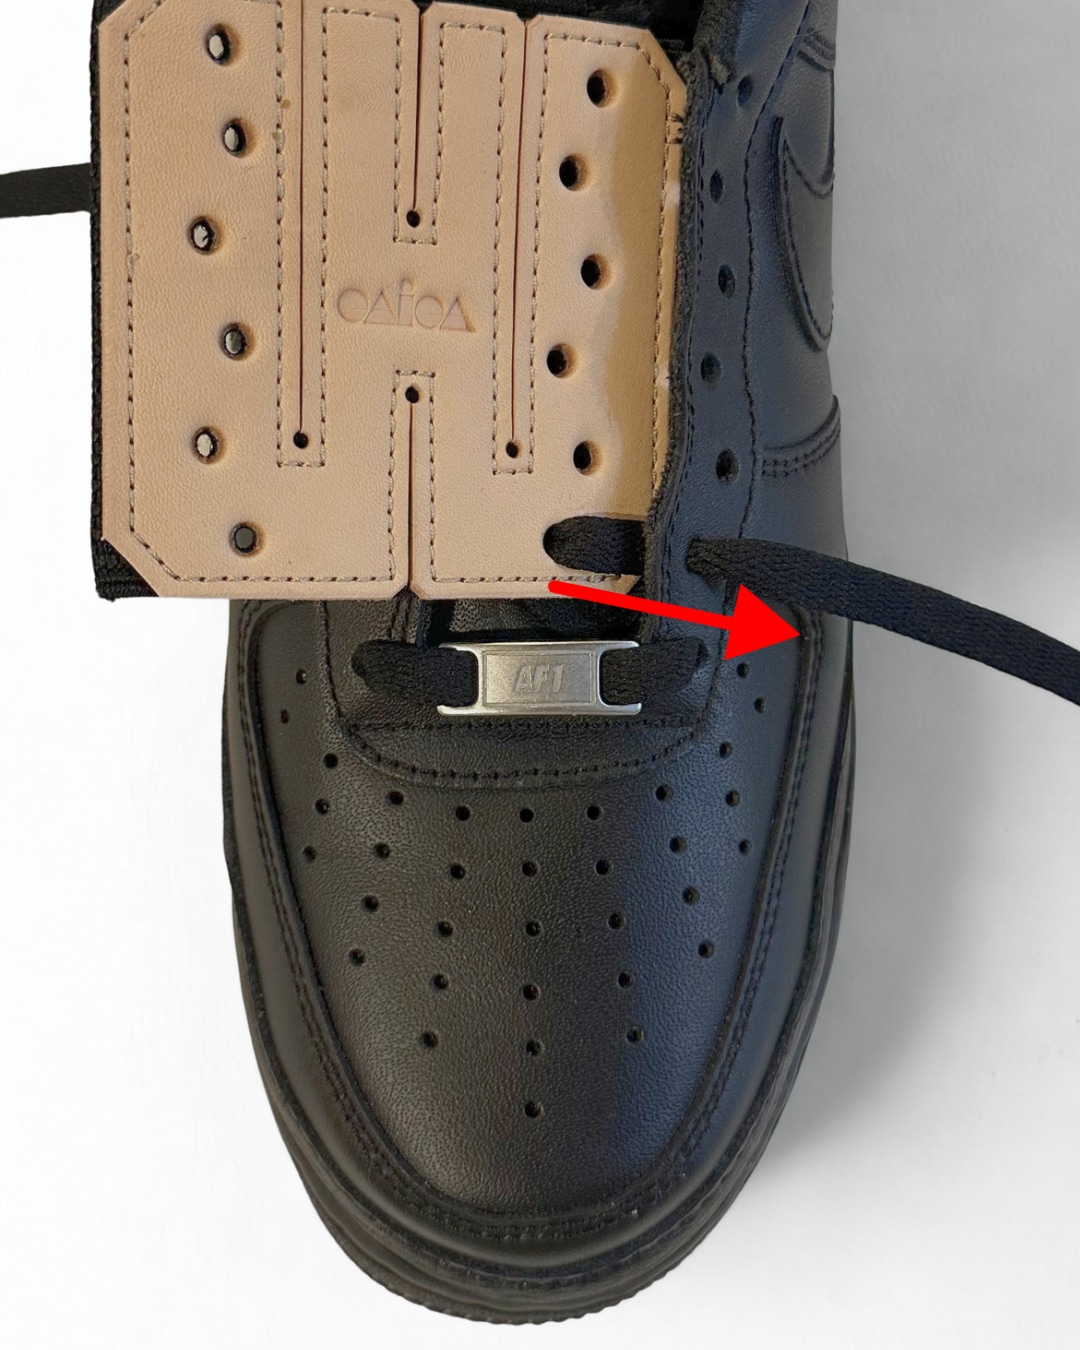
③ From the outside to the inside, thread the shoelace through the next eyelet up first, then through the front gore accessory.
※ As you'll be threading laces through these loops later, leaving a little slack now will make it easier to string them.
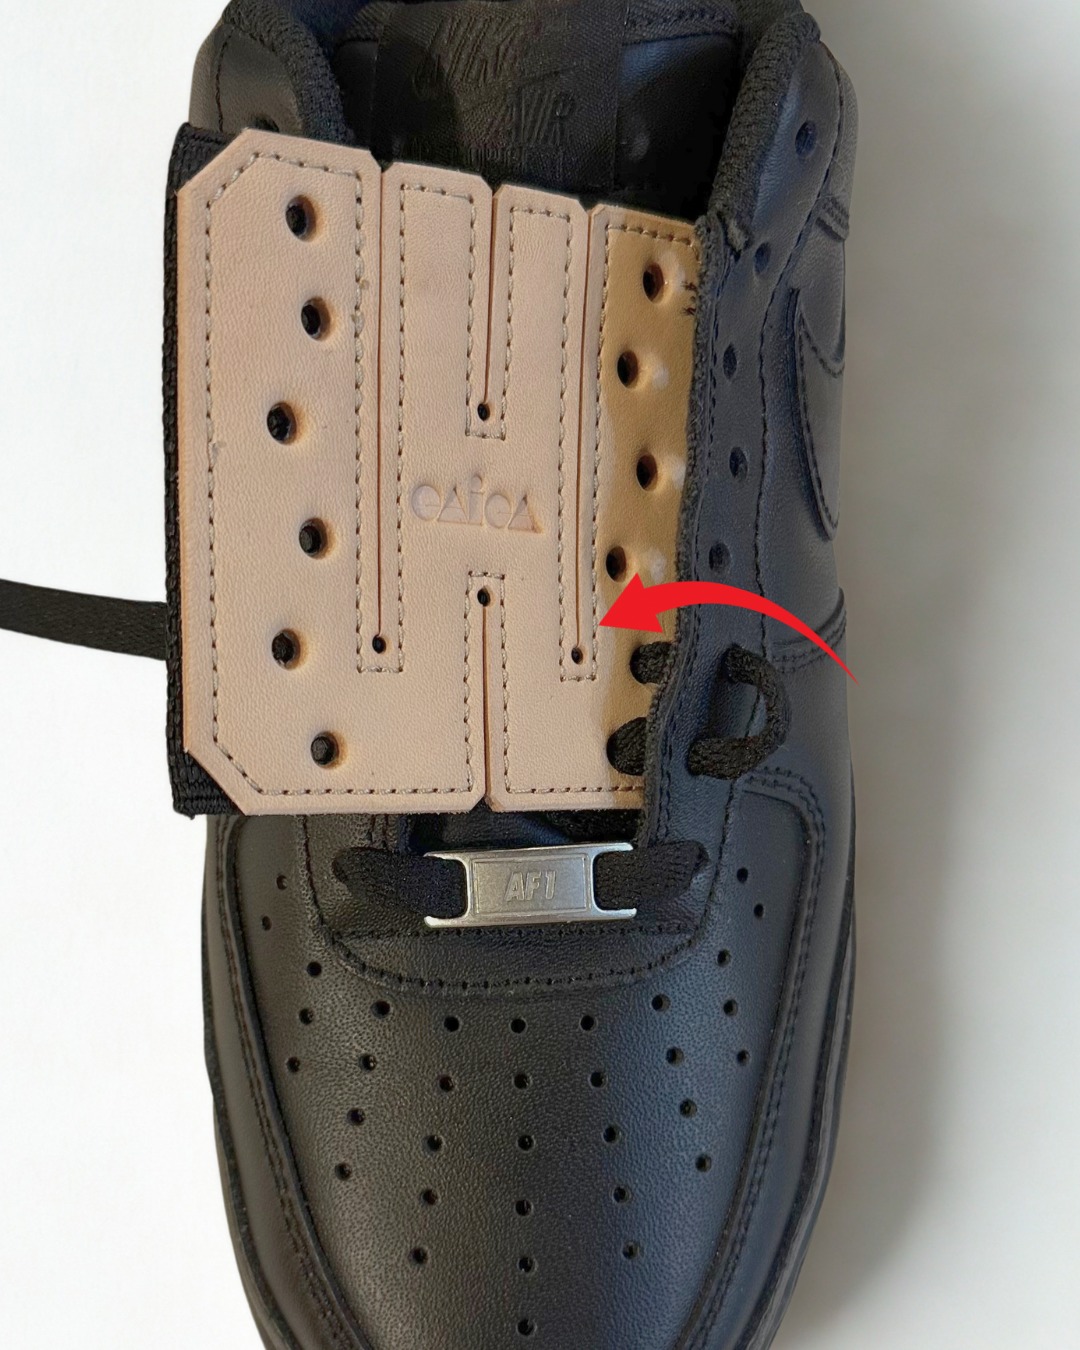
④ For the subsequent steps, repeat procedures ② and ③ as you move upwards. For the topmost eyelet, thread the shoelace through the shoe eyelet only, going from the inside to the outside.

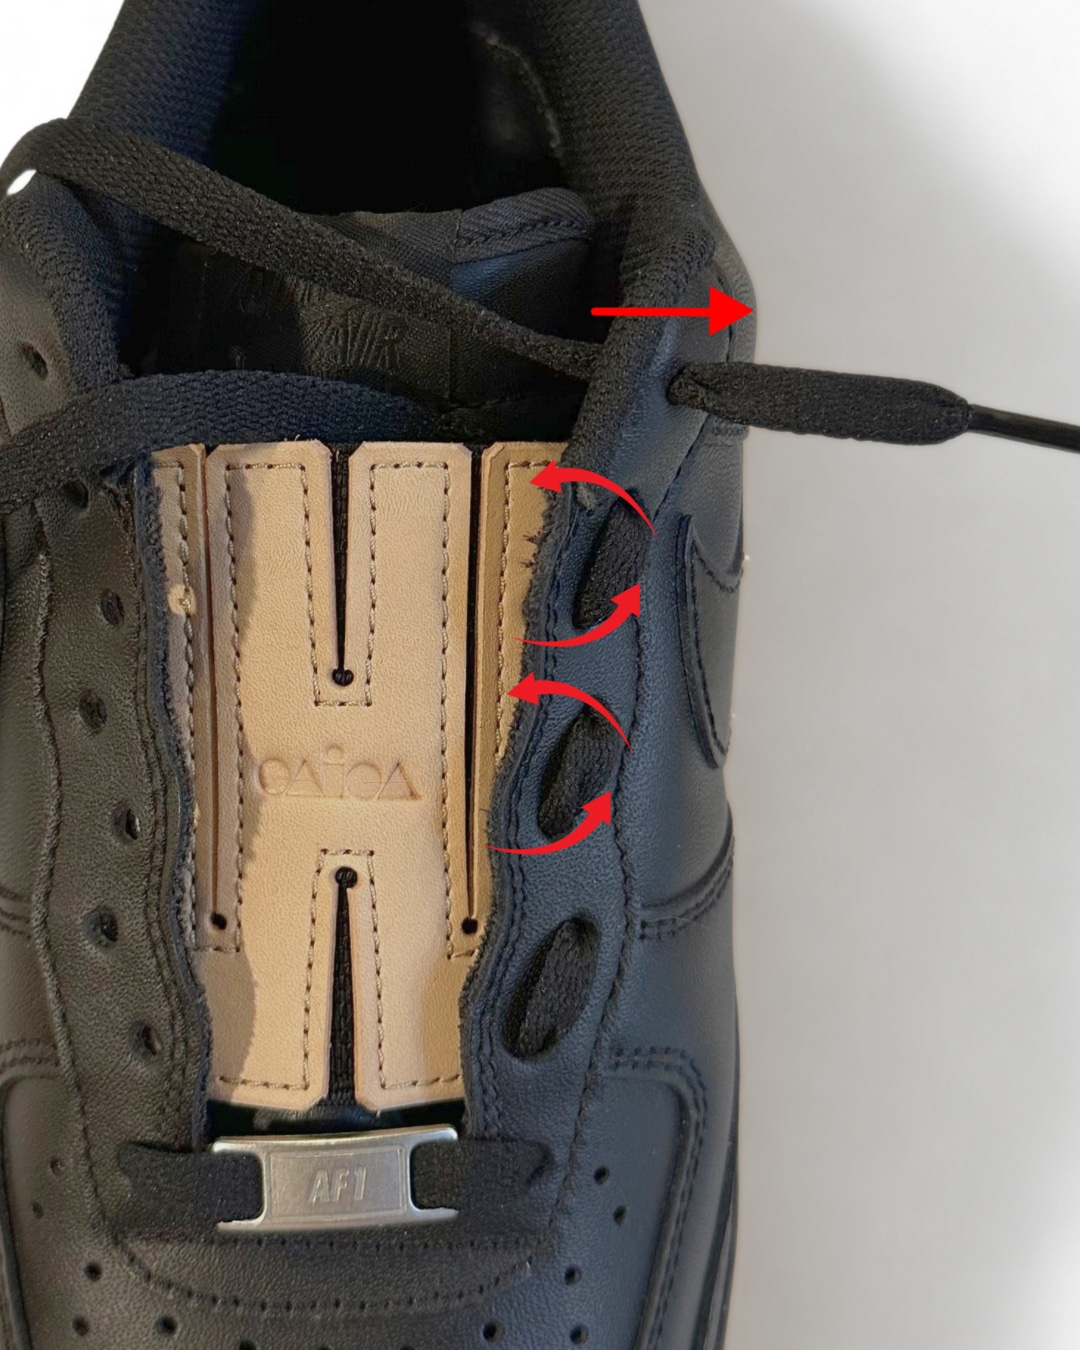
⑤ Alternately thread the shoelace from top to bottom, passing it underneath the loop you just made.

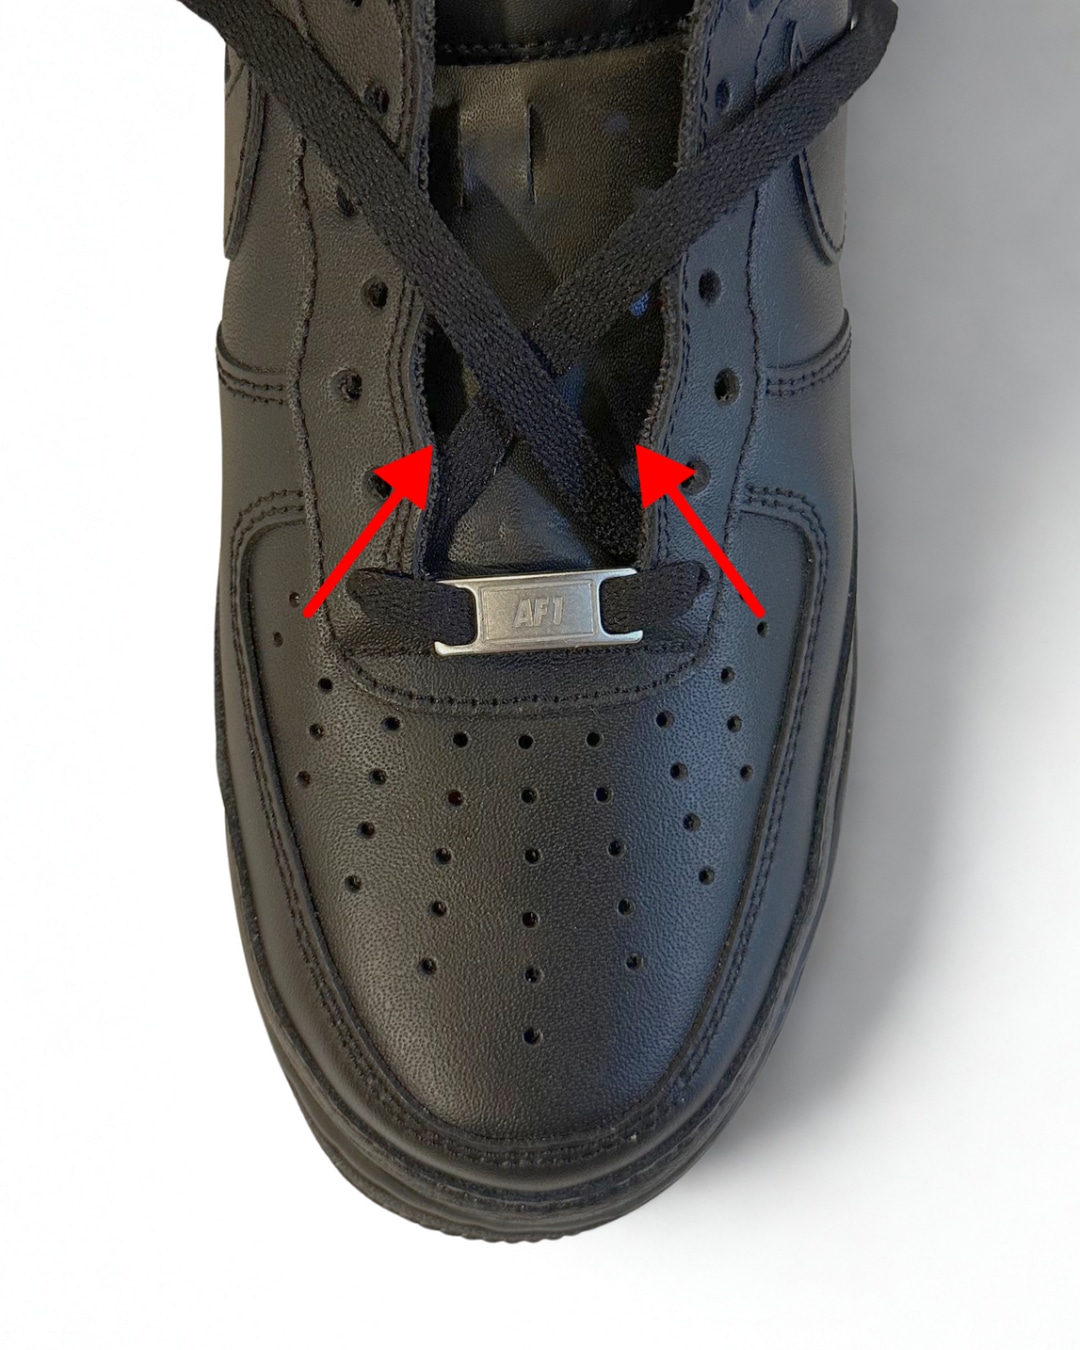
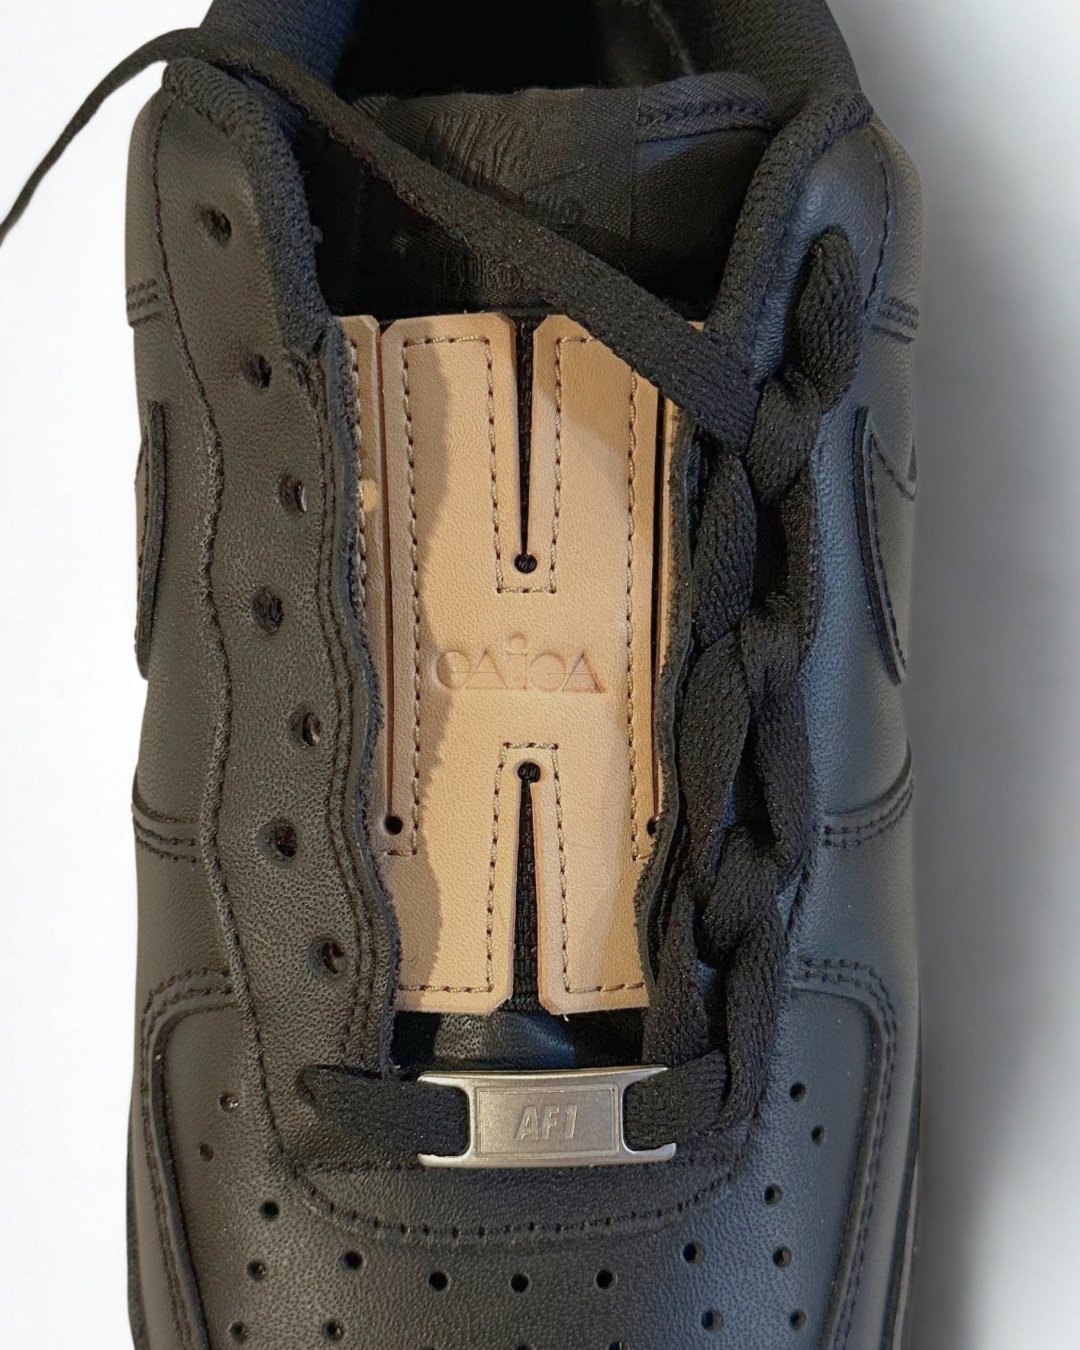
⑥ For the very bottom, thread the shoelace underneath both the shoelace and the dubrae (NIKE tag).

⑦ Thread the shoelace from bottom to top, alternately passing it underneath the loops, just as in step ⑤.

⚠️For ease of taking the shoes on and off, tying the bow knot a little loosely can save you the trouble of retying the laces.
⚠️If the fit feels too tight when worn, try threading the laces more loosely when attaching the parts.

Once the accessory is installed, putting on and taking off your shoes will be much easier in the future.
What's more, the natural leather accents give your shoes a truly one-of-a-kind look.
The lacing method shown is just one example. Feel free to enjoy your front gore accessories however you like!